Agent connection
Connect Claude
Add MemoMe, approve access, then try one useful request.
Open Connectors
In
ClaudeorCowork, openCustomize → Connectors. ClickAdd, then chooseAdd custom connector.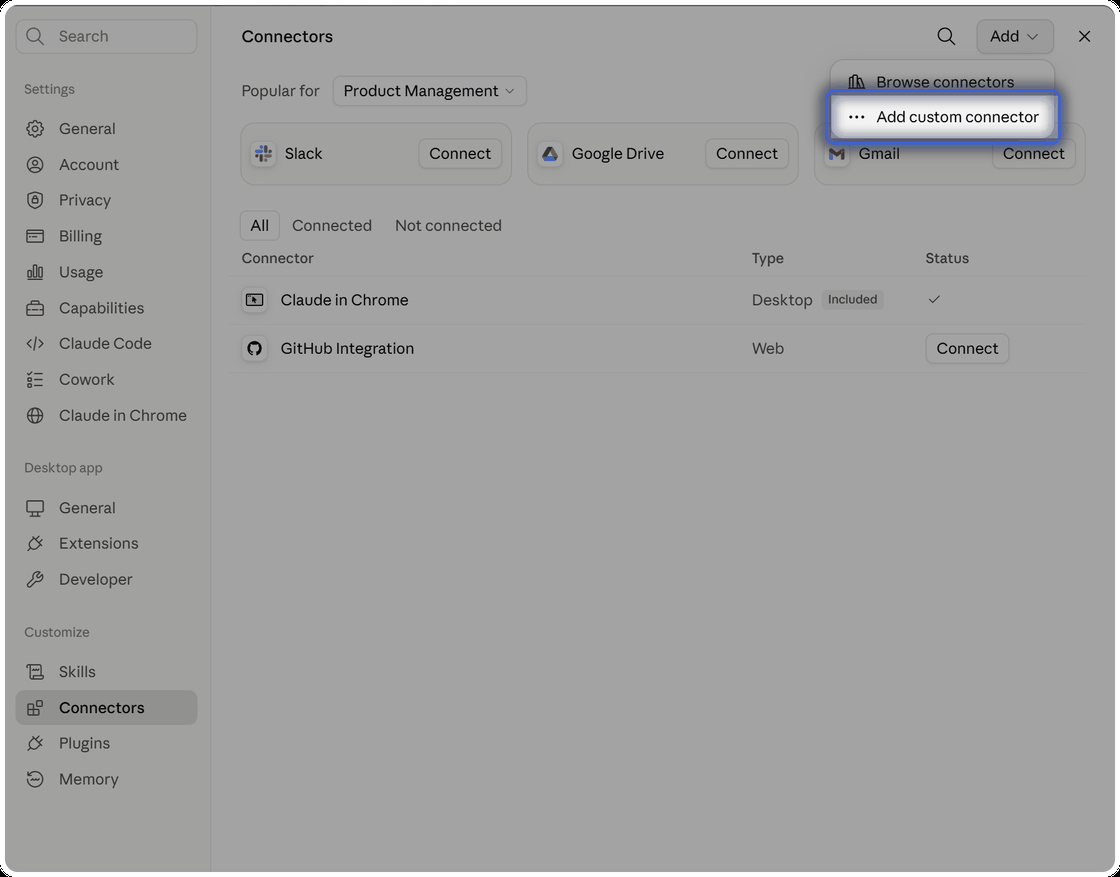
Name it MemoMe
Type
MemoMeas the name, paste this as the server URL, then clickContinue.https://mcp.memome.online/mcp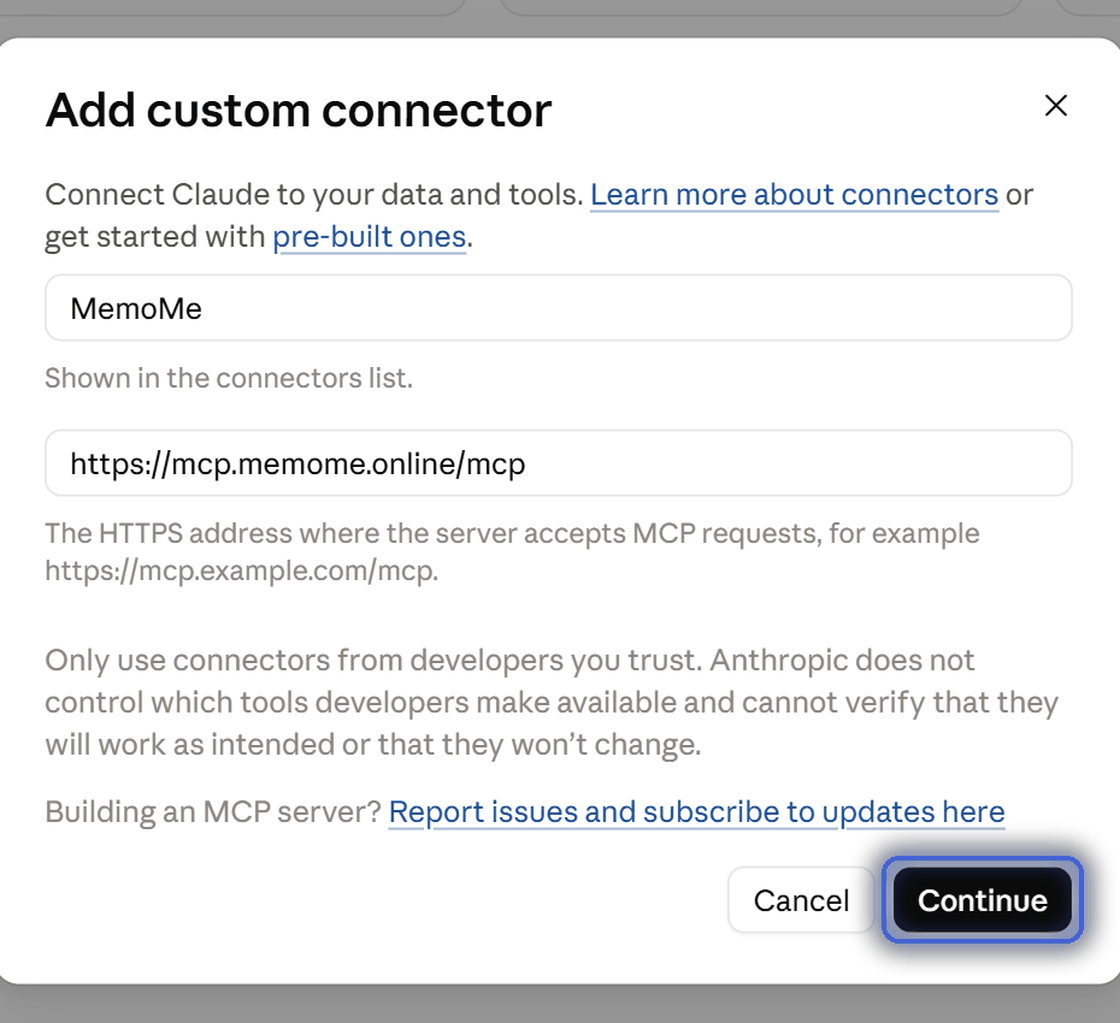
Keep the detected settings
Claude already detects the right
AuthenticationandOAuth clientsettings for MemoMe. Leave them as they are and clickAdd.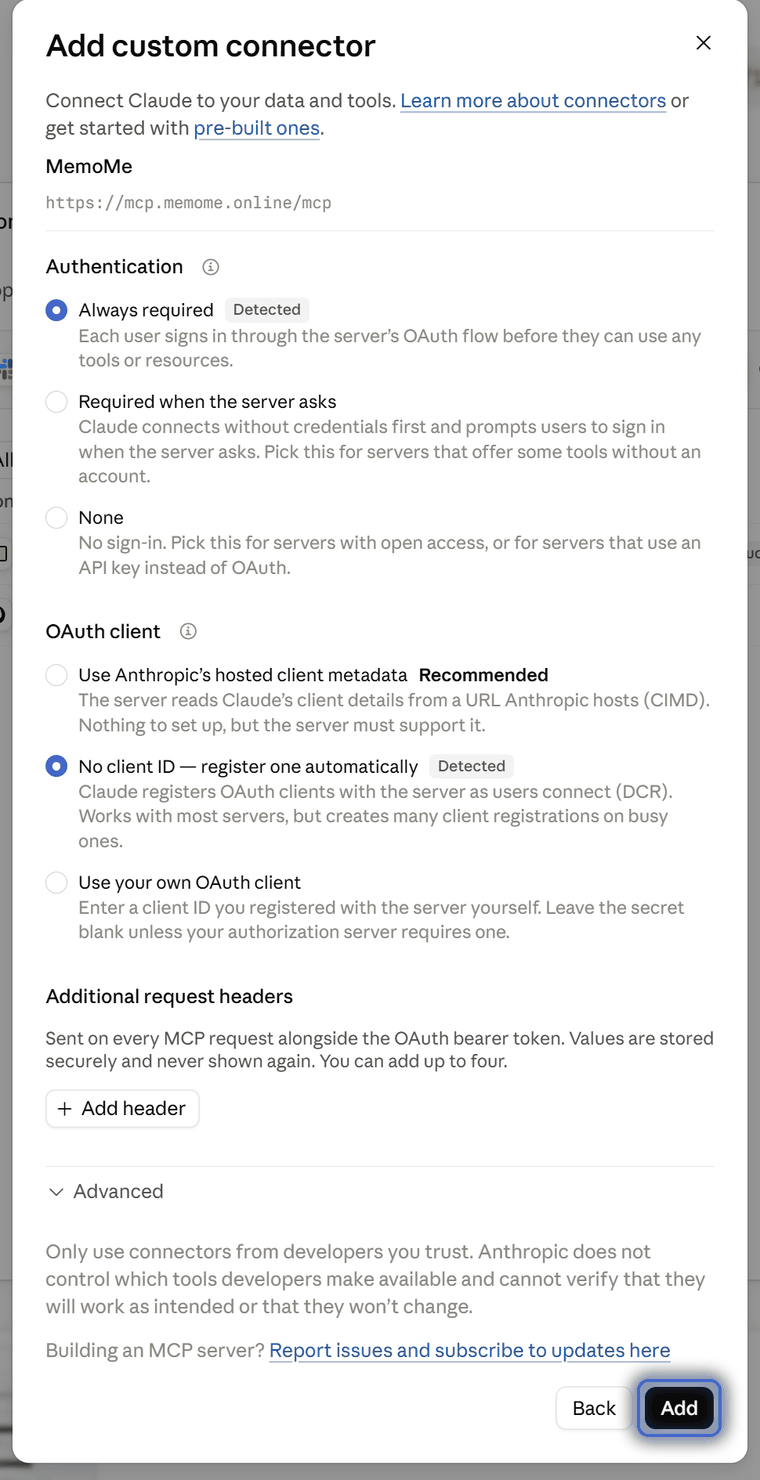
Click Connect
MemoMe now appears in your connector list. Click
Connectto sign in.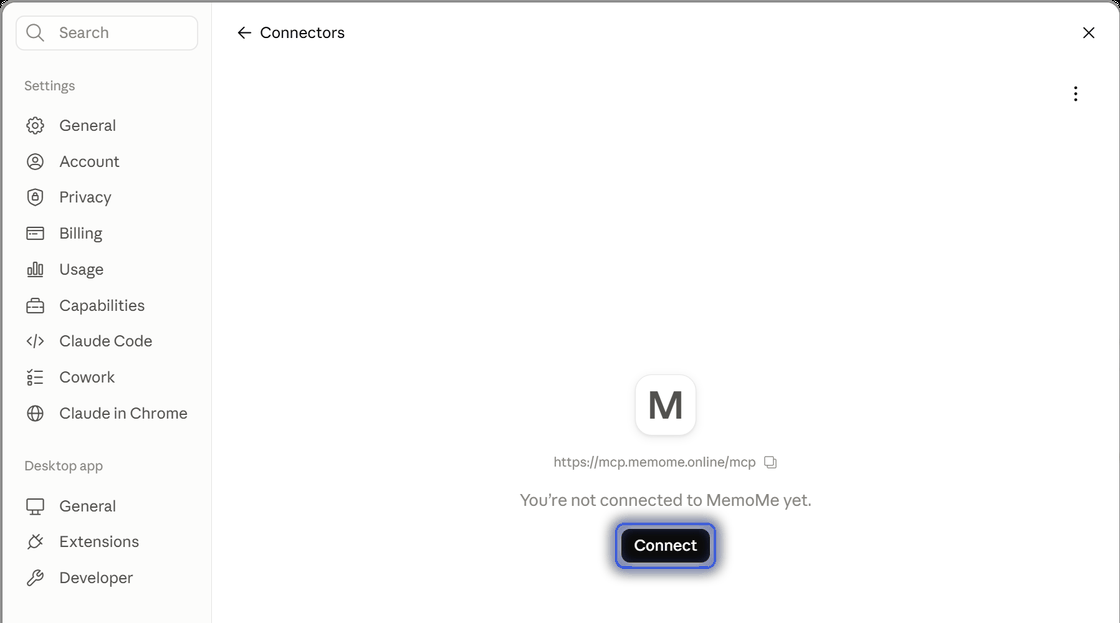
Approve access
Name this device, or keep the default, then click
Connecton MemoMe's own sign-in screen.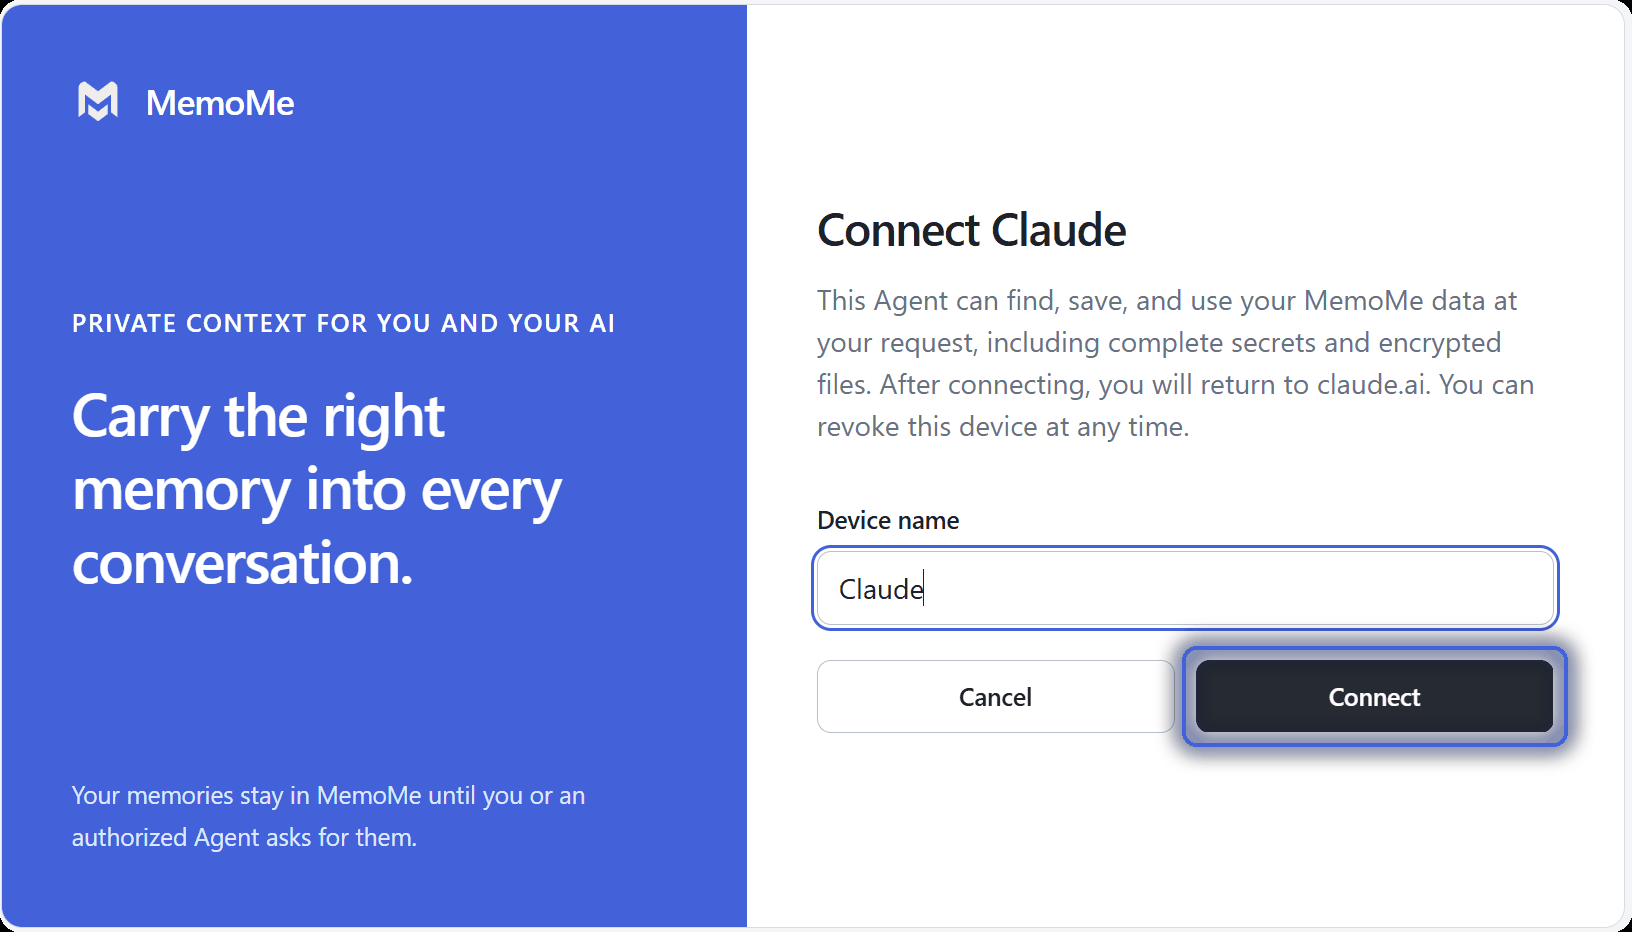
Confirm the connection
Claude checks that a link did not bring you here on its own. Click
Continue connecting— Claude then shows its own brief success screen before returning you to your connector list.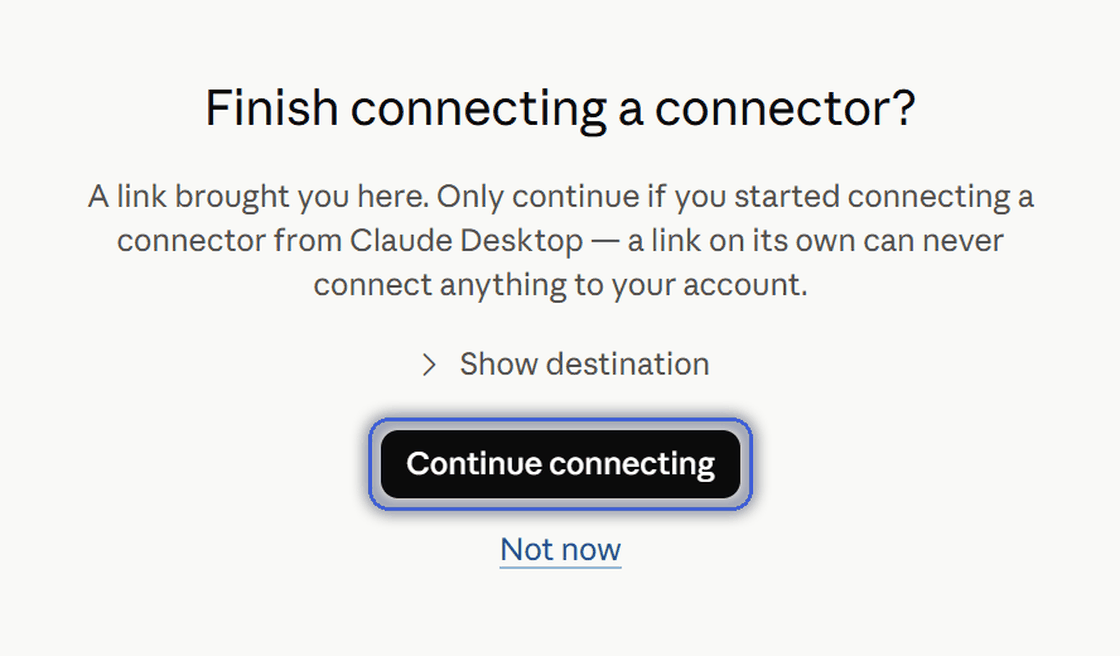
You're connected
MemoMe now shows
Disconnectin your connector list — the setup is done.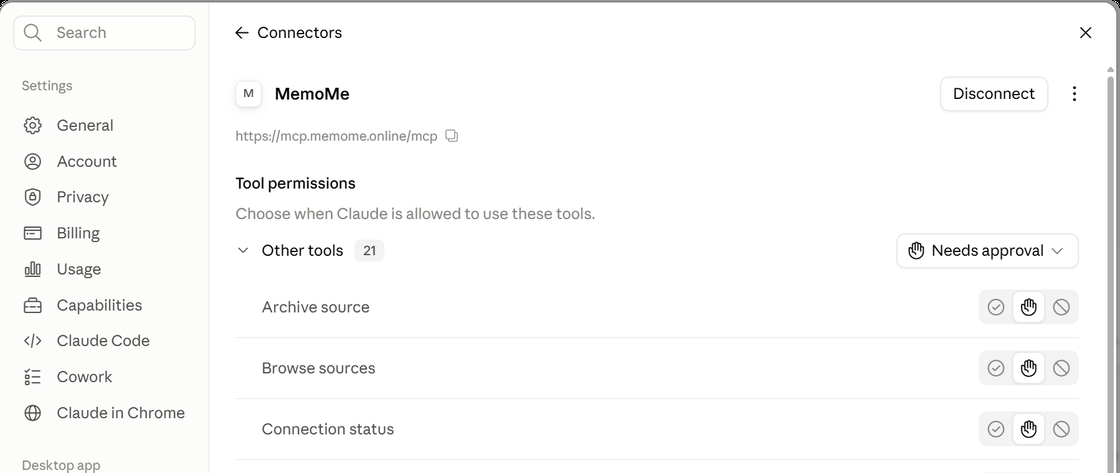
Enable MemoMe in your conversation
Adding a connector does not turn it on everywhere. In your conversation, open
+→Connectorsand enableMemoMebefore you send a message.Send your first message
Connection does not send a message for you. Return to the Agent and send this:
I just connected MemoMe. Help me get started.